|
 |
-
-
 Top
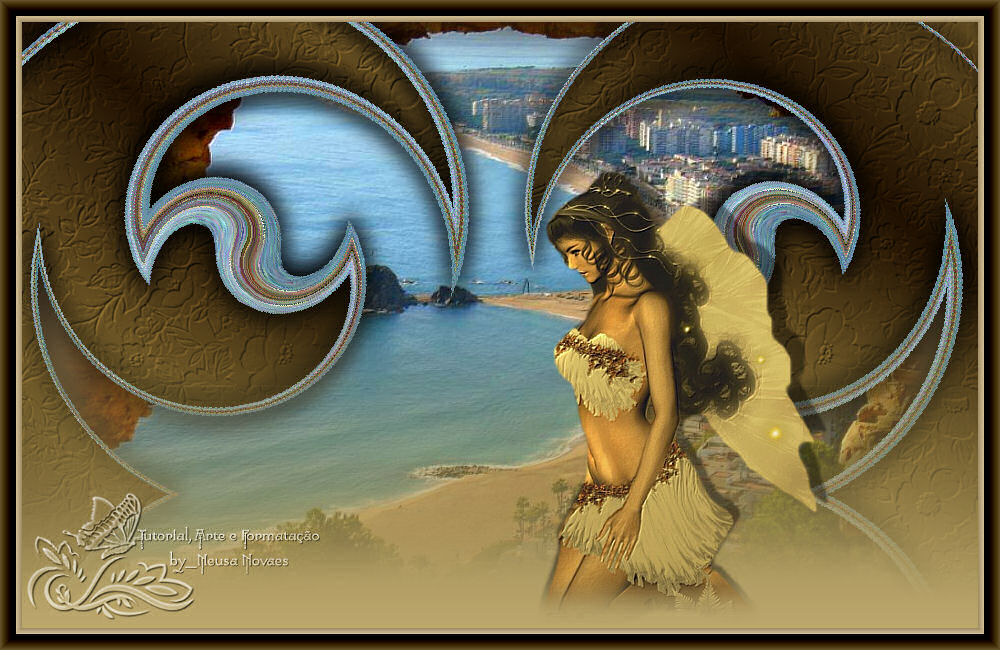
Olhar de Anjo
Top
Olhar de Anjo
-
-
Dependendo de sua
conexão a tradução pode demorar um pouco
-
-
Material
-
- 2 Tubes
- Plugin Filter
Factory Gallery
- Plugin FM Tiles
Tools
- Plugin AAA Frames
- Efeitos do PSP
-
- Vamos começar?
- 1- Abra seu tube
de paisagem Edit > Copy e pegue duas cores para
- fazer um
gradiente linear Angle 0 Repeat 1
-
- 2- Abra uma
transparência de 1000 x 600 px. preencha com o gradiente
-
- 2- Selections >
Select all e paste into selection
-
- 3- Selections >
Select None
-
- 4- Effects >
Image Effect > Seanless Tiling = Default
-
- 5- Effects >
Edge > Enhance More duas vezes
- (dependendo de sua imagem)
-
- 6- Adjust > Blur
> Radial Blur conforme printe
-
-
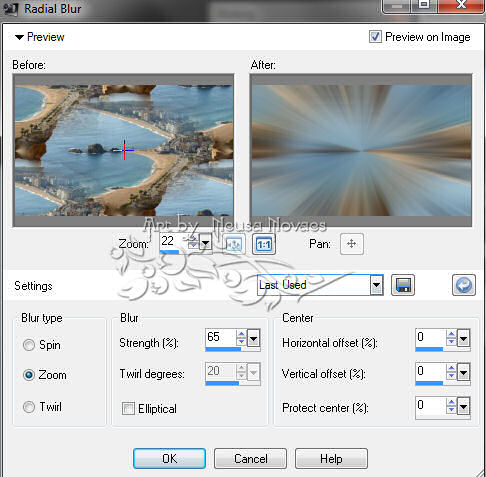
-
- 7- Effects >
Geometric Effect > Perspective Horizontal = 80 - Transparent
-
- 8- Image >
Mirror
-
- 9- Repita
Item 6 mudando o Distortion para 100
-
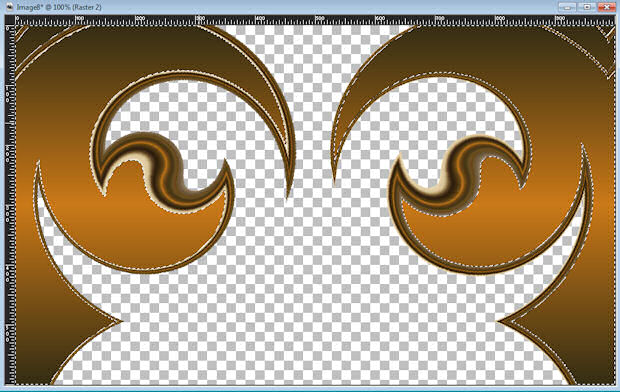
- 10- Plugin >
Gallery B > Seismic Twirl conforme printe
-
-
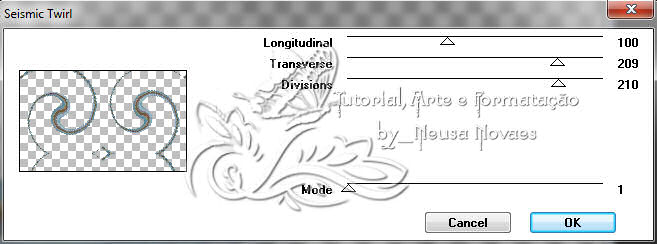
-
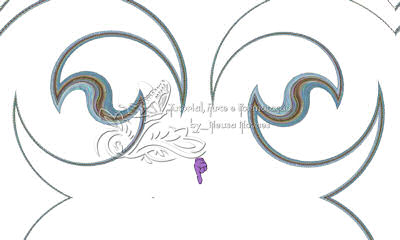
- 11- Com a
ferramenta borracha apague todo o centro conforme printe
-
-
- 12- Com a ferramenta Magic Wand
selecione
toda a parte transparente acima conforme printe
-
-
- 13- New Layer e
Arrange > Move down
- 14- Selections >
Modify > Expand = 4 px
-
- 15- Preencha com
gradiente linear 45 - 4 cores usadas anteriormente
-
- 16- Effects >
Texture Effect conforme printe
-
-
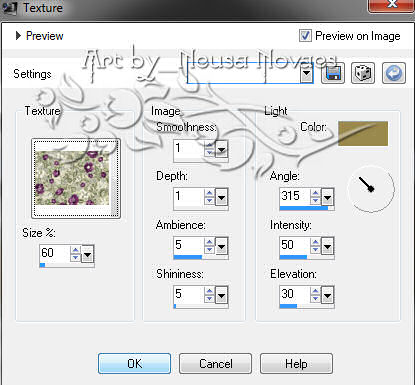
-
- 17-
Retire seleção
-
- 18- Ative a
Raster 1 do Seismic Twirl e selecione a parte transparente
- (selecionar inclusive aquela
parte apagada, se for necessario manter clicado o Ctrl)
-
- 19- Repita item 14 modificando
somente para 5 px
-
- 20- New layer
Arrange > Move down
-
- 21 - Edit > Copy
sua paisagem Edit > Paste Into Selection retire a seleção
-
- 22- Plugin FM
Tile Tools > Saturation Emboss Edge Warp desmarcado
-
- 23- Ative
novamente a Raster 1 e aplique drop shadow negativo e positivo a gosto
- (eu apliquei 10
- 0 - 100 - 30,00)
-
- 24- Nova Layer
Arrange > Send to botton
-
- 25- Preencha com
seu gradiente Linear 0 - 0 Invert marcado
-
- 26 - Layers > Merge > Merge
Visible
-
- 27- Image > Canvaz Size 1000px -
650px sendo 50px no botton
-
- 28- New Layer - Arrange send to
botton
-
- 29 - Repita item 25
-
- 30- Ative seu tube da mulher Edit > Copy
-
| | |

