- Vamos
aprender agora a fazer animação em slats.
-
-
-
- 1
- Abra no PSP um slat a gosto Selections > Select all logo
a seguir Selections > Float
-
( veja que somente a slat esta selecionada )
-
- 2
- Preencha com uma textura dourada a gosto
-
-
3 - Ainda com o slat selecionado
-
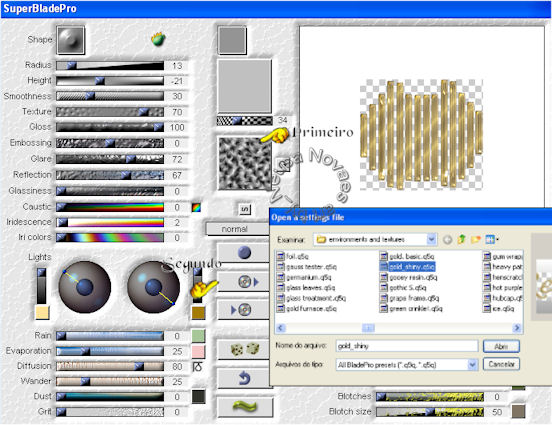
Plugin Flaming Pear > Super Bland Pro conforme printe localize
Ouro Crack e logo a seguir Gold_Shiny clique OK
-
-
-
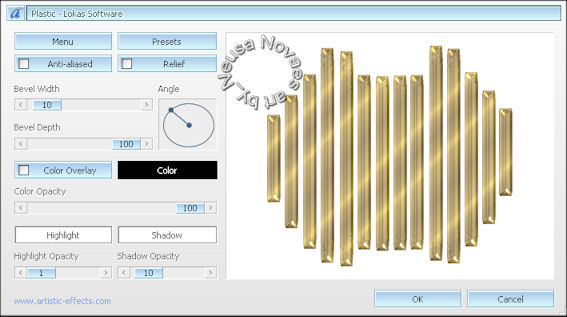
4 - Ainda com a seleção
-
Plugin Lokas Software > Plastic conforme printe
-
-
-
5 - Retire a seleção
-
-
6 - Layers > New raster layer
-
-
7 - Layers > Arrange > Send to botton
-
- 8
- Preencha com uma cor escura de seu tube
-
-
9 - Caso queira, aplique uma textura a gosto e nomeie como
fundo
-
-
10 - Volte a layer da slat e duplique por 2 vezes ficando
assim com 3 layers nomeie slat 1 - slat 2 - slat 3
-
-
11 - Tire a visibilidade da slat 2 e 3 e ative a 1
-
-
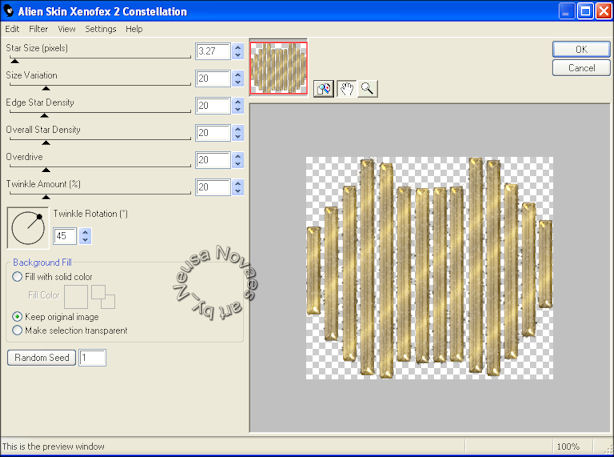
12 - Plugin Alien Skin Xenoflex 2 > Constelation
-
conforme printe
-
-
-
13 - Ative o slat2 e repita item 12 modificando somente o
Random Seed para 5125
-
-
14 - Ative slat3 e repita item 12 modificando para 1000
-
-
15 - Abra seu tube Edit > Copy
-
-
16 - Edit > Paste as New Layer
-
-
17 - Plugin FM Tile Tools > Blend Emboss 2 vezes
-
-
18 - Layers > New Raster Layer
-
-
19 - Escolha uma fonte bem bonita e escreva um texto
-
com relevo
-
-
20 - Duplique esse texto 2 vezes e nomeie texto1, texto2
e texto3
-
-
21 - Adjust > Add/Remove Noise > Add Noise
-
no texto1 = 15; texto2 = 20 e texto3 = 25
-
-
22 - Tire a visibilidade dos textos 2 e 3
-
-
23 - Se voce quiser pode fazer uma borda bem bonita
-
-
24 - Edit > Copy Special > Copy Merged e leve para o
AS como New Animation
-
-
25 - Tire a visibilidade do slat 1 e texto 1 e ative as slat
2 e
-
texto 2
-
-
26 - Repita item 24
-
-
27 - Repita itens 25 e 26 na slat 2 e texto 3 e ative as slats
3 e texto 3
-
-
28- Teste e salve sua animação
-