-
-
-

-

Terms of use
Click on the flag of your country, for
translation.
Depending on your connection the translation
may take a while
Materials
3 Tubes
Materials
HERE
Mehdi Plugin
Muras Meister Plugin
Tutorial on EML
HERE
Video Tutorial
HERE
PSP Effects
Let's start!!!
1.- Open a transparency 900 x 600 px
2.- Fill with a chosen color of your tube (I
chose # 634224)
3.- Layers> New Raster Layer and select
4.- Open the landscape tube Edit> Copy
5.-Edit> Paste Into Selection and deselect
6.- Effects> Image Effect> Seamless Tiling =
Default
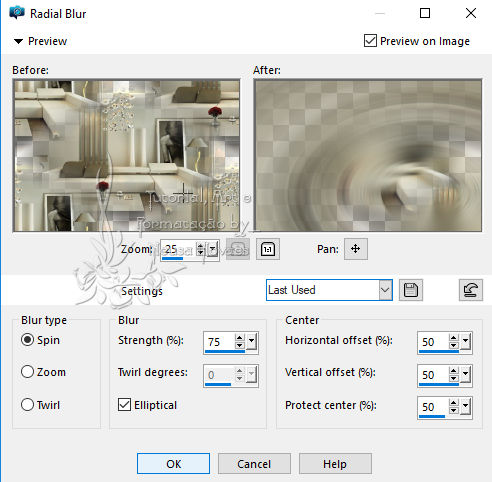
7.- Adjust> Blur> Radial Blur according to
printe
8.- Enhance More
9.- Enhance
10.- Merge Down
11.- Duplicate
12.-Mehdi Plugin> Sorting Tile according to
printe

13.-Image>
Resize = 90%
14.- With the Magic Wand tool select
transparency and Invert
15.- Apply Drop Shadow = 0 - 0 - 80 - 60,00 in
black color
16.-Remove selection
17.-Open your landscape Edit> Copy and return to
your work and Cole Opacity = 80%
18.-One Step Photo Fix - Blend Mode = Luminance
- Sharpen
19.-Take the Landscape Raster visibility and
Activate Copy of Raster 1 and Merge Down
20.-Edit> Copy
21.-Still without Raster visibility of the
landscape
22.-Image> Canvaz Size = 900 x 750 px being 150
px in Botton
23.- With the Magic Wand tool select the
transparency
24.-Paste the selection and Promote Selection to
Layer and deselect
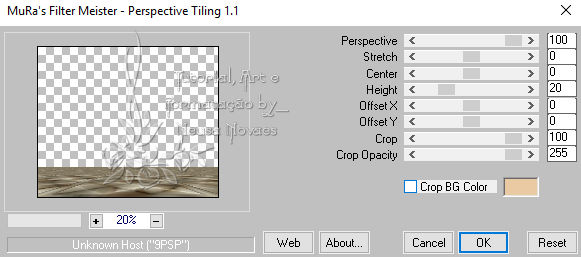
25.-Plugin Muras Meister> Perspective Tiling
according to printe
26.-Open the visibility of your landscape
27.-Open your tubes Edit> Copy
28.-Glue the New Layer and position to taste
29.-Apply Drop Shadow = 1 - 1 - 80 - 10,00 color
black
30.-Enable Raster 1 and New Layer
31. Fill in the color white
32.-Apply Mask Narah Abstract271 attached
33.-Enhance More and Merge Group
34.-Opacity = 80%
35.-Image> Add Border = 2px dark color
36.-Image> Add Border = 2px light color
37.-Image> Add Border = 2px dark color
38.-Image> Add Border = 2px light color
39.-Image> Add Border = 2px dark color
40.-Open your tube floral Edit> Copy
41.-Paste the New Layer and resize
42.-Blend Mode = Luminance
43.-Sharpen and Duplicate
44.-Image> Horizontal Mirror and Merge Down
45. Apply your mark and mine.
46. Resize your art to 900 px
47.-Save your art in jpg
NOTE: - Do not forget to put the credits to the
right ones.
** Tutorial created by Neusa Novaes *
September 6, 2018
Copyright reserved.
Prohibited total or partial transfer, copies,
alterations
publication in websites or blogs, without
author's authorization.
Credits
Main Tubes: -Received from Misae Tubes
|
