Vamos começar!!! Clique na borboleta para seguir o tutorial
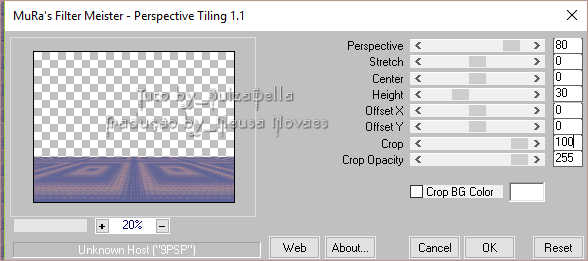
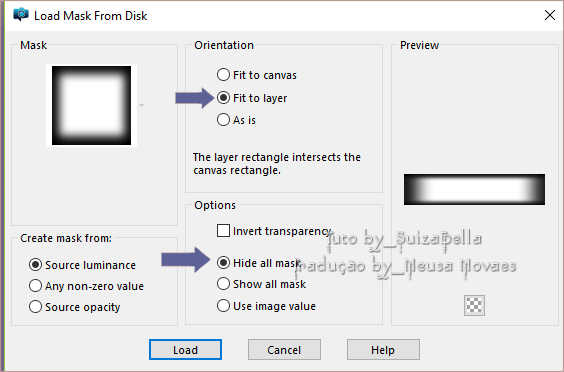
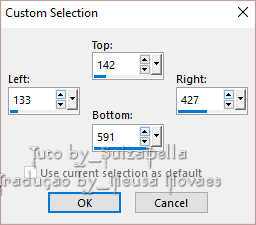
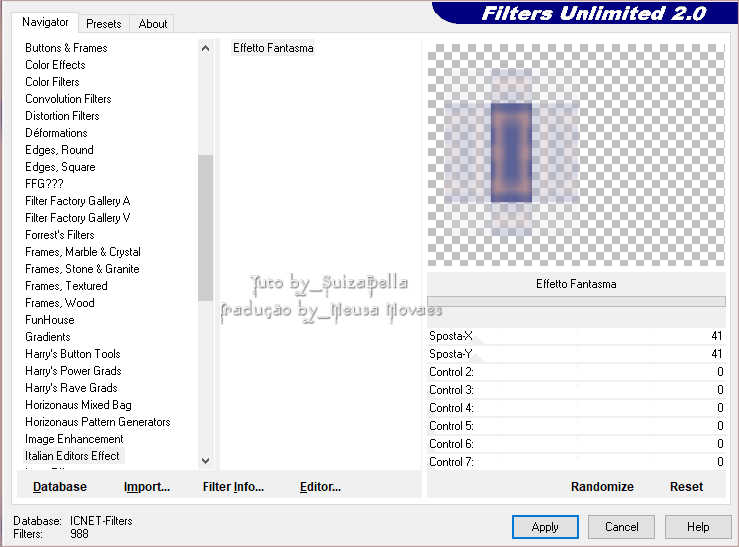
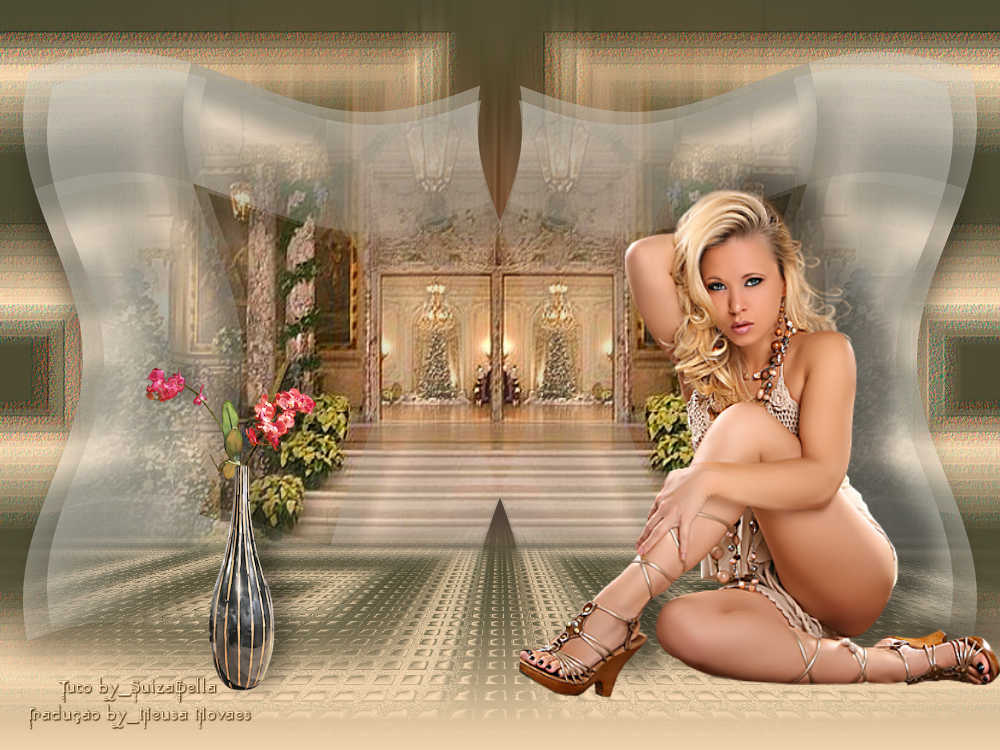
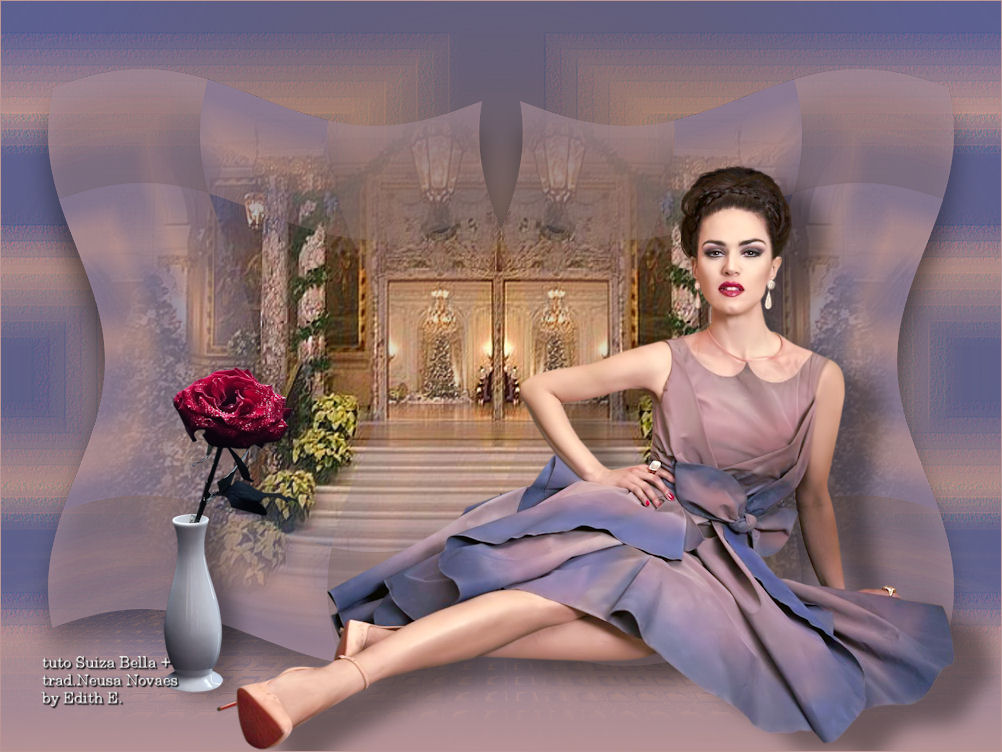
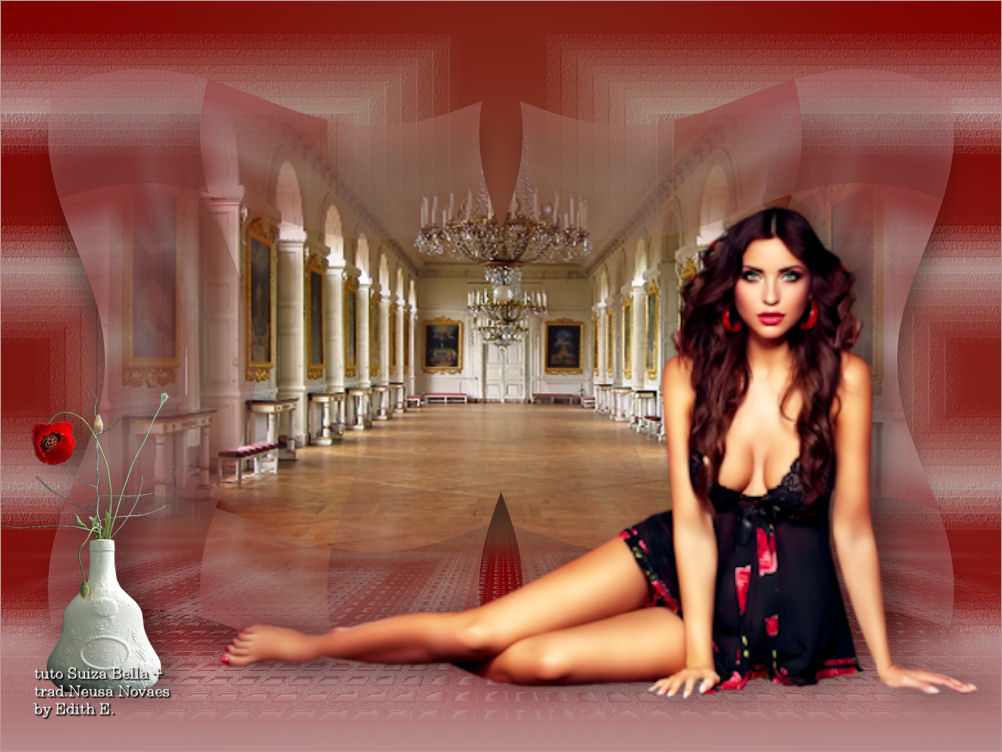
21.- Preenchemos com o gradiente 22.- Repetir item 3 23.- Tirar seleçao 26.- Duplicar 27.- Image > Mirror Horizontal 28.- Merge Down 29.- Duplicar e Resize= 95% 30.- Merge Down 31.- Selecionar e Selections > Float 32.- Abrir, copiar e colar na seleção o tube 3604-luzcristina.pspimage 33.- Tirar seleção 34.- Aplicar sombra= 26 - 0 - 54 - 38,10 35.- Merge Visible 38._ Merge Group 39.- Layers > New Raster Layer 40._ Preenchemos com o Backgraund 41.- Layers > Arrange > Send to Botton 42.- Merge Visible 43.- Abrir, copiar e colar em nova layer o tube Grisi_Woman_769 (1).pspimage 44- Resize= 70 % 45.- Effects > Image Effect > OffSete= Horizontal= 85 - Vertical= -81 46.- Aplicar sombra= -20 - 38 - 38 - 28,57 47.-Abrir, copiar e colar em nova layer o tube Mary 0312-34.pspimage 48.- Resize= 50% 49.- Effects > Image Effect > OffSete= Horizontal= -270 - Vertical= -154 50.- Aplicar Sombra= -4 - 16 - 38 - 28,57 Sua arte você pode enviar para este e-mail, para coloca-lo nesta exposição. ou para a tradutora
<> <>
|