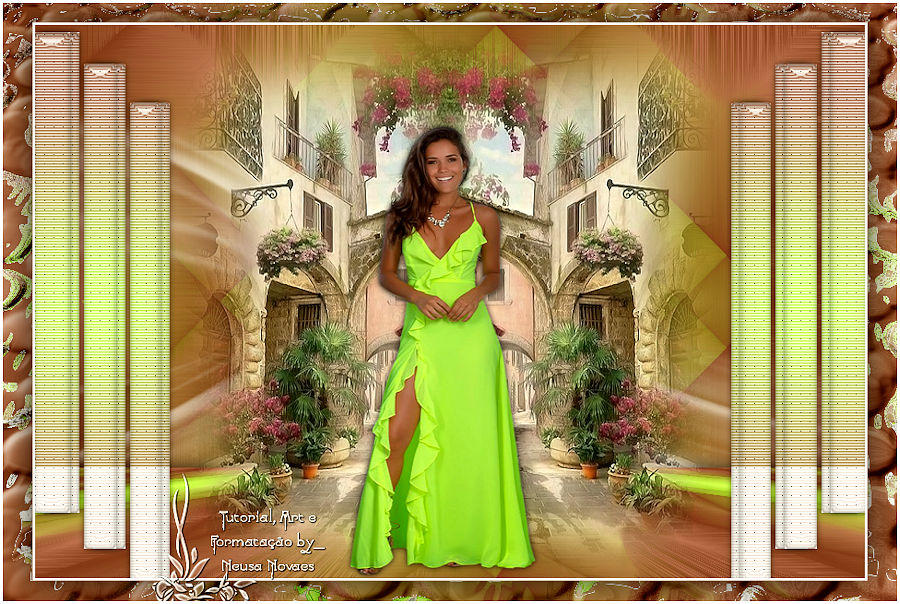

Terms of use
- 2 Tubes
- Mehdi Plugin
- Muras
Meister Plugin
-
Redfield Plugin
-
Alien
Sky Eye Candy5 Impact Plugin
-
AAA
Filters Plugin
-
EML Tutorial
HERE
-
Video
HERE
-
PSP
Effects-
MATERIALS
HERE -
Place
seleccionsuiza1903 in your selections folder
-
Script
Click on the butterfly to follow the tutorial

Enjoy
Stay at Home !!!
Let's start!!!
- 1.-Open a 900 x 600 px transparency
2- I put it in Foregraund # c2f64a and Backgraund # 9e5c42
3- Make a 0 - 0 Sumburst gradient and fill the transparency
4.- Adjust> Add / Remove Noise> Add Noise = Uniform and
Clicked monochrome - Noise = 20
5.- Duplicate
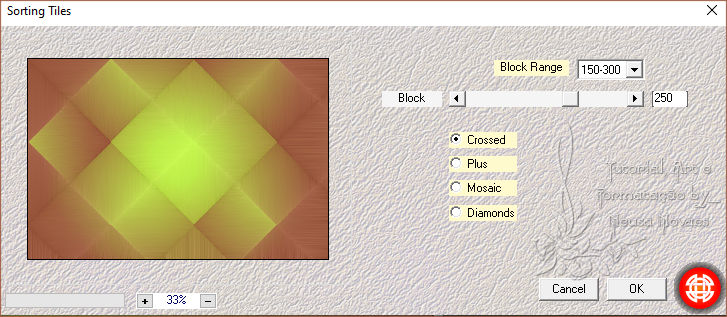
6.-Mehdi Plugin> Sorting Tiles as shown
-
-
- 7.- Duplicate again
8.- Image> Vertical Mirror
9.- Blend Mode = Darken and Merge Down
10.- New Layer
11.- Selections> Load Save Selection> Load Selection From Disk
and find the seleccionsuiza1903
12.- Fill the selection with your gradient
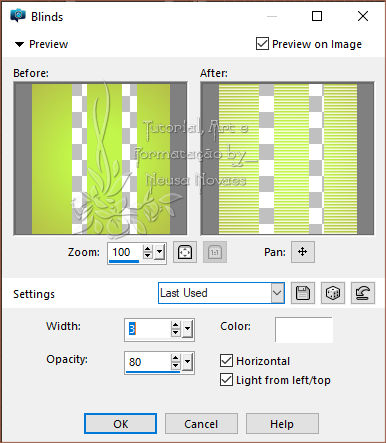
13.- Texture Effects> Blinds as shown
-
-
- 14.-
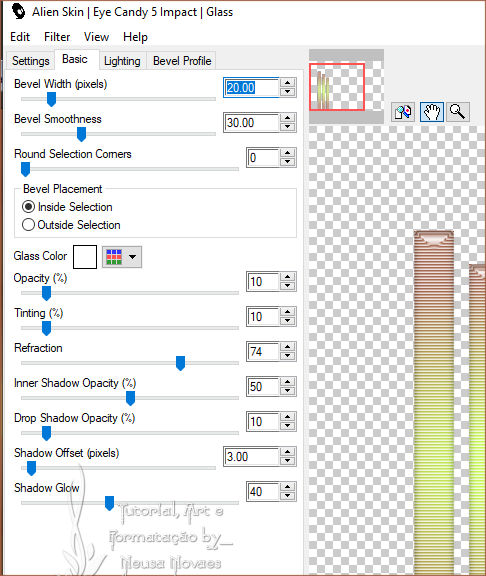
Alien Sky Eye Candy5 Impact>
Glass plug-in as shown
-
-
- 13.- Apply eyeshadow = 0 - 0 - 50 -
10.00 black color
14.- Remove Selection
15.- Objects> Align> Top
16.- Objects> Align> Left
17.-Duplicate
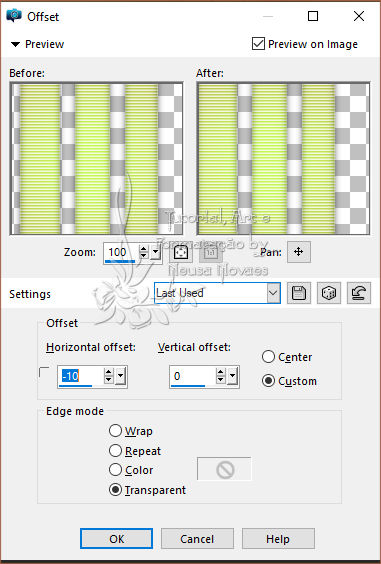
18.- Image Effects> OffSet as shown
-
-
- 19.-Merge Down
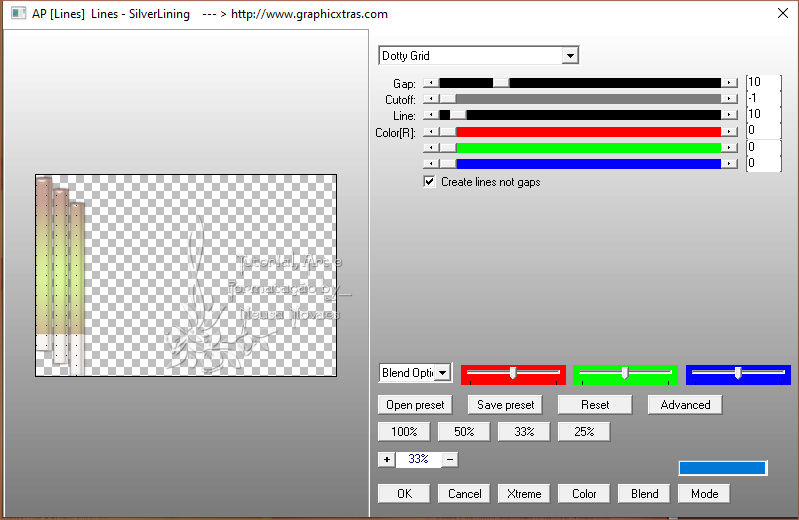
20.- AP Lines Plugin> SilverLining as shown
-
-
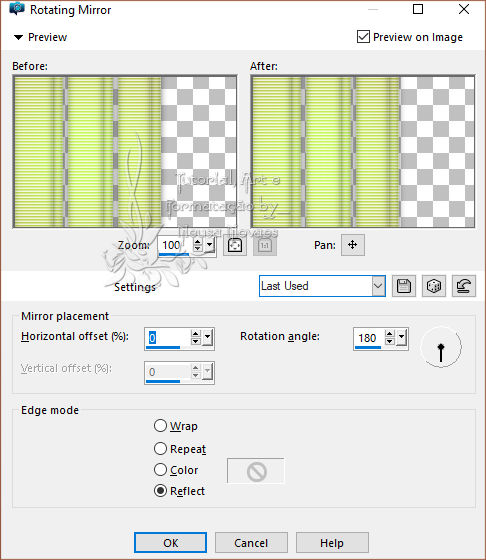
- 21.- Reflection Effects> Rotating
Mirror according to printer
-
-
- 22.-Activate Copy of Raster 1
23.-Open, copy and paste your landscape tube as a new layer
24.-Resize = 65%
25.- Place according to model and duplicate
26.- Image> Mirror Horizontal
27.- Adjust> Sharpness> Sharpen
28.-Activate Copy of Raster 1 again and duplicate
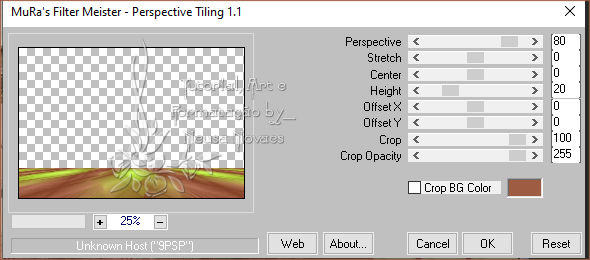
29.- Muras Meister Plugin> Perspective Tiling as shown
-
-
- 30.-Apply eyeshadow = 0 - 0 - 80 -
30.00 in black
31.- Open, copy and paste the main tube as a new layer
32.-Resize = 65% or whatever you need and place according to model
33.- Adjust> Sharpness> Sharpen
34.- Put shade to taste
35.- Activate Copy of Raster 1 again
36.- Copy and reserve
37.-Layers> New Raster Layer and fill in white
38.- Apply the Narah Mask Abstrata186 and Merge Group - Opacity = 80%
39.- Add Borders = 3 px white
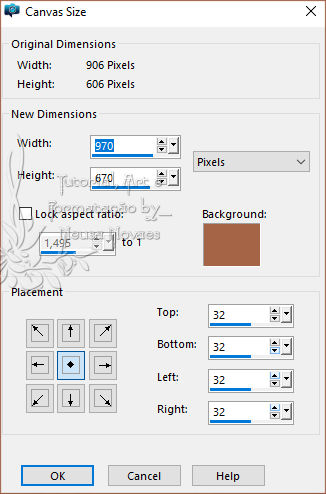
40.-Image> Canvaz Size as shown
-
-
- 41.-Activate the Magic Wand and
select the part that has been increased
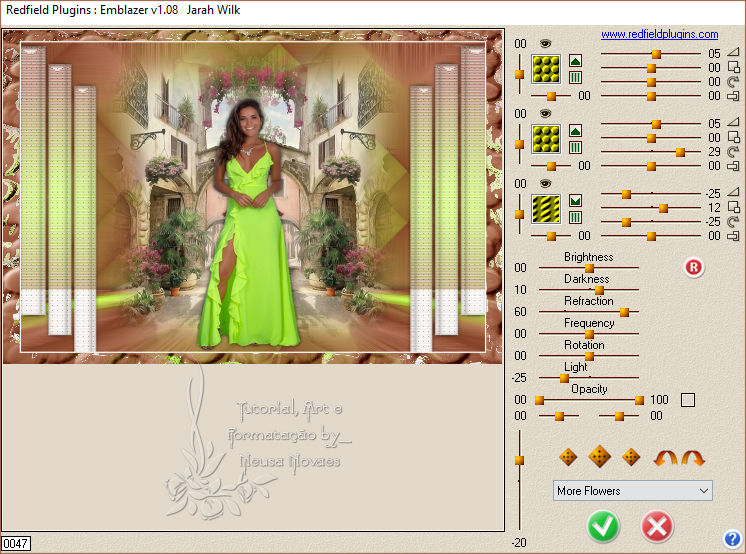
42.-Edit> Paste Into Selection
43.- Redfield Plugin> Emblazer as shown
-
-
-
44.-
Selections> Invert
45.- Place eyeshadow = 0 - 0 - 80 - 60.00 black color
46.- Put your brand and mine and Merge Down
47.- Add Borders = 3 px white
48.-Resize = 900 px
49.- AAA Filters plugin> Custom = Landscape
50.-Save in JPG -

-
- ** Tutorial created by Neusa Novaes **
July 20, 2020
Copyright reserved
Any similarity is purely coincidental.
Total or partial transfer, copies, alterations prohibited
publication on websites or blogs, without authorization from the author.
NOTE: - Do not forget to place the credits to those entitled

 Crédits Crédits  Tubes: LB e Grupo
de trocas sem autoria


|