13.-Reflection Effect> Rotating
Mirror = 0 - 180 - Reflect clicked
14.-Object> Align> Top and with the
Pick Tool up to 200 px
15.-Duplicate and Image> Vertical
Mirror
16.-Merge Down
17.-With the Pick Tool pull right
and side
until it touches the top
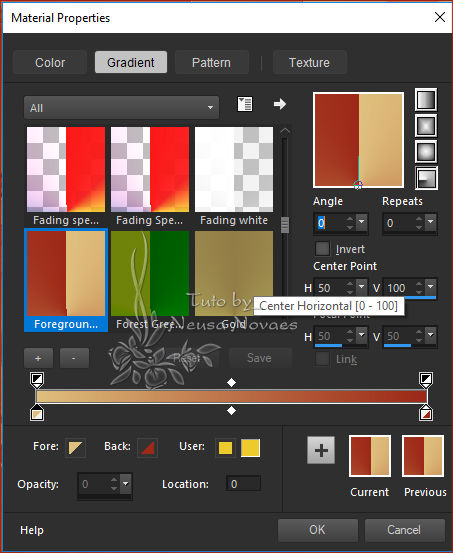
18.-New Layer and fill with your
Foregraund
19.-Apply the mask QabfNGY and Merge
Group
20.-Apply Drop Shadow = 0 - 0 - 50 -
10,00 color black
21.-Adjust> One Step Photo Fix
22.-Enable Raster 2
23.-Open your tube of edit and copy
landscape
24.-Cole as a new layer
25.-Adjust> One Step Photo Fix
26.-Activate Copy of Raster 2 and
apply drop Shadow =
0 - 0 - 80 - 10,00 in black color
27.-Activate Raster 2 again and
duplicate
28.-Image> Horizontal Mirror
29.-Blend Mode = Darken
30.-Adjust> One Step Photo Fix (only
on this layer)
31.-Activate the layer that applied
the mask (Merge Group)
32.-Image> Free Rotate according to
printe
13.-Reflection Effect> Rotating
Mirror = 0 - 180 - Reflect clicked
14.-Object> Align> Top and with the
Pick Tool up to 200 px
15.-Duplicate and Image> Vertical
Mirror
16.-Merge Down
17.-With the Pick Tool pull right
and side
until it touches the top
18.-New Layer and fill with your
Foregraund
19.-Apply the mask QabfNGY and Merge
Group
20.-Apply Drop Shadow = 0 - 0 - 50 -
10,00 color black
21.-Adjust> One Step Photo Fix
22.-Enable Raster 2
23.-Open your tube of edit and copy
landscape
24.-Cole as a new layer
25.-Adjust> One Step Photo Fix
26.-Activate Copy of Raster 2 and
apply drop Shadow =
0 - 0 - 80 - 10,00 in black color
27.-Activate Raster 2 again and
duplicate
28.-Image> Horizontal Mirror
29.-Blend Mode = Darken
30.-Adjust> One Step Photo Fix (only
on this layer)
31.-Activate the layer that applied
the mask (Merge Group)
32.-Image> Free Rotate according to
printe
 33.-Object> Align> Left
34.-Duplique and Image> Horizontal
Mirror
35.-Using the Pick Tool, set both
ends up to 450px
36.-Merge Down
37.-Distortion Effect> Wave
according to printe
33.-Object> Align> Left
34.-Duplique and Image> Horizontal
Mirror
35.-Using the Pick Tool, set both
ends up to 450px
36.-Merge Down
37.-Distortion Effect> Wave
according to printe
 38.-Merge Visible
39.-Duplicate
40.-Activate the Merged and Image>
Canvaz Size as printe
38.-Merge Visible
39.-Duplicate
40.-Activate the Merged and Image>
Canvaz Size as printe
 41.-Activate Copy of Merged
42.-Muras Meister Plugin>
Perspective Tiling according to
printe
41.-Activate Copy of Merged
42.-Muras Meister Plugin>
Perspective Tiling according to
printe
 43.-Layers> Arrange> Send to Botton
44.-With the Pick Toll tool take up
to 560px
45.-Merge Down
46.-Selections> Load / Save
Selection> Load Selection
from Disk and locate select_lolis
47.-Promotion Selection to Layer
48.-Take the selection
49.-Effects> Edge Effets> Erode
50.-Simple Plugin> Left Right Wrap
51.-Simple Plugin> Top Left Mirror
52.-Merge Down
53.-Copy and Reserve in New Layer
54. Go back to work and open the
main tube
55.-Edit> Copy and paste in new
layer give a riseze and place
in place and shade to taste
56.-Image> Add Borders = 3 px color
backgraund
57.- Image>
Add Borders = 3 px foregraund color
58.-Image> Add Borders = 3 px color
backgraund
Select
59.-Image> Add Borders = 45 px color
foregraund
60. Inverts
61.-Paste your reservation
62.-Adjust> Blur> Radial Blur
according printe
43.-Layers> Arrange> Send to Botton
44.-With the Pick Toll tool take up
to 560px
45.-Merge Down
46.-Selections> Load / Save
Selection> Load Selection
from Disk and locate select_lolis
47.-Promotion Selection to Layer
48.-Take the selection
49.-Effects> Edge Effets> Erode
50.-Simple Plugin> Left Right Wrap
51.-Simple Plugin> Top Left Mirror
52.-Merge Down
53.-Copy and Reserve in New Layer
54. Go back to work and open the
main tube
55.-Edit> Copy and paste in new
layer give a riseze and place
in place and shade to taste
56.-Image> Add Borders = 3 px color
backgraund
57.- Image>
Add Borders = 3 px foregraund color
58.-Image> Add Borders = 3 px color
backgraund
Select
59.-Image> Add Borders = 45 px color
foregraund
60. Inverts
61.-Paste your reservation
62.-Adjust> Blur> Radial Blur
according printe
 63.-Plugin All's Border FX> Border
Fade II as printe
63.-Plugin All's Border FX> Border
Fade II as printe

64.-Adjust> One Step Photo Fix
65.-Select
66.-Selections> Modify> Contract
= 45
67.-Apply Drop Shadow = 0 - 0
-80 - 60,00 black color
68.-Take the selection
69.-Image> Add Borders = 3 px
color foregraund
70.- Put
your mark and my
71.-Resize = 900px
72.-AAA Filters Plugin> Custom =
Landscape
63.-Save your art in jpg
 NOTE: - Do
not forget to put the credits to
whom right.
** Tutorial created by Neusa
Novaes *
May 15, 2019
NOTE: - Do
not forget to put the credits to
whom right.
** Tutorial created by Neusa
Novaes *
May 15, 2019
Copyright reserved.
Prohibited total or partial
transfer, copies, alterations
publication in websites or
blogs, without author's
authorization.
 Credits
Main Tubes: Rooskes, KaD and
Mask_QabfNGY
Credits
Main Tubes: Rooskes, KaD and
Mask_QabfNGY