

Terms of use
- 2 Tubes
-
Mehdi Plugin
-
Muras
Meister Plugin
-
Redfield Plugin
-
AAA
Filters Plugin
-
EML
Tutorial
HERE
-
Video
HERE
-
PSP
Effects-
MATERIALS
HERE -
Script
Click on the butterfly
to follow the tutorial

Enjoy
Stay at Home !!!
Let's start!!!
-
1.-Open Alpha_Good_memories
2- I put it in Foregraund #
ab919a and Backgraund #
efdee4
3- Make a Radial gradient 0
- 0 and fill the
transparency
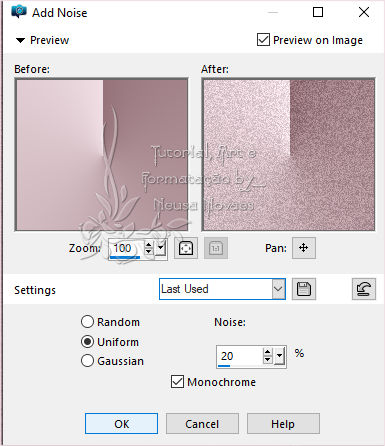
4.- Adjust> Add Remove Noise>
Add Noise as shown-
-
-
5.- Duplicate
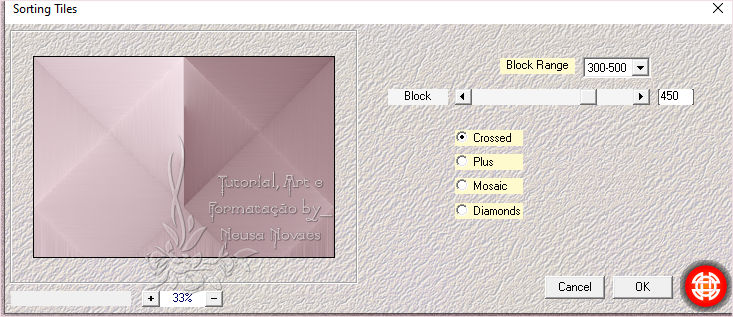
6.- Mehdi Plugin> Sorting
Tiles as shown
-
-
-
7.- Duplicate again
8.- Image Mirror Vertical
9.-Blend Mode = Darken and
Merge Down
10.- Adjust> Add Noise as
above
11.- Selections> Load / Save
Selection> Load Selection
From Alpha Channel
and find Selection # 1
12.- Selections> Promote
Selection to Layer and
deselect
13.- Apply eyeshadow = 0 - 0
- 80 - 30.00 black color
14.- Duplicate and Image>
Horizontal Mirror
15.- Merge Down and
Duplicate
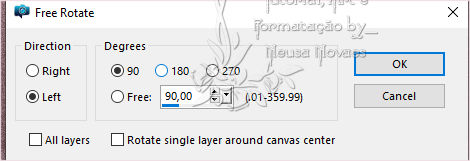
16.-Image> Free Rotate as
shown
-
-
- 17.-Merge Down
18.-Activate Copy of Raster
2 and duplicate
19.-Muras Meister Plugin>
Perspective Tiling by
placing 20 Height
the rest leaving as it opens
20.-Put the same shade
21.-Activate the Promote
Selection Raster
22.- Layers> New Raster
Layer
23.- Fill with the
backgraund color
24.-Apply the Mask,
duplicate and merge group
25.-Put shadow like item 13
26.-Duplicate and Merge Down
27.- Duplicate again, Image>
Mirror horizontal and Merge
Down
28.-Adjust> One Step Photo
Fix
29.-Activate Promote Select
again and add shadow to
taste
(put 0 - 0 - 80 - 10.00
color black)
30.-Blend Modes and Opacity
from mask = Darken - 100%
Promote Selection = Darken -
80%
Restant = Normal - 100%
31.-Open, copy and paste the
main tube in a new layer
32.-Place to taste and, if
necessary, resize
323.-Adjust> Sharpness>
Sharpen and One Photo Fix if
necessary
34.-Put shadow to taste
35.-Open, copy and paste in
a new layer the vase tube or
any other
36.-Repeat items 31 - 32 and
33
37.-Copy and reserve Copy of
Raster 2 and Merge Visible
38.-Add Borders = 5 px white
39.-Add Borders = 45 px dark
color
40.-Activate the Magic Wand
and select the dark part
41.-Paste what was reserved
as Into selections
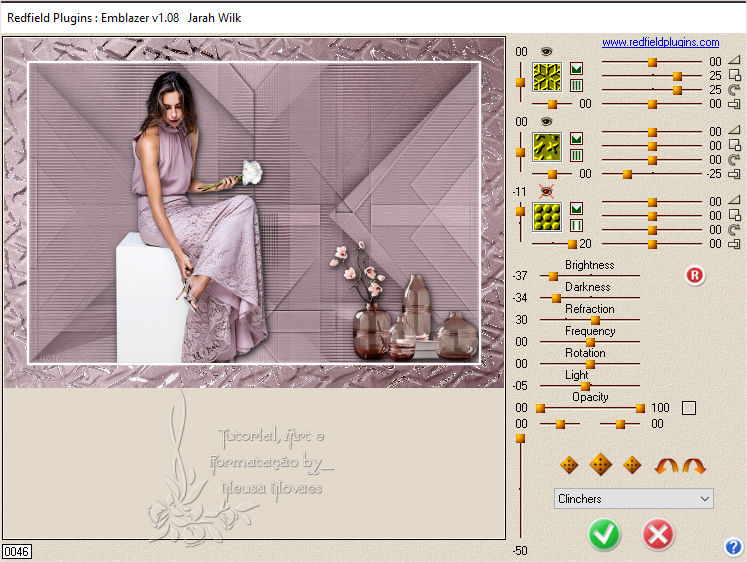
42.- Redfield Plugin>
Emblazer as shown
(To make the bar the same,
just click on the color
image as follows:
in image 1 = 06, image 2 =
13 and in image 3 = 11
-
-
- 43.- Selections> Invert
and apply the remainder = 0
- 0 - 80 - 60.00 black color
44.- Remove the selection
45.- Add Borders = 5 px
white
46.-Layers> New Raster Layer
put your brand and mine and
Merge Visible
47.-Resize = 900 px
48.- AAA Filters plugin>
Custom = Landscape
49.-Save in JPG
-

-
- ** Tutorial created by
Neusa Novaes **
July 24, 2020
Any similarity is purely
coincidental.
Total or partial transfer,
copies, alterations
prohibited
publication on websites or
blogs, without authorization
from the author.
NOTE: - Do not forget to
place the credits to those
entitled
|

