
Termos of use
-
2 Tubes
- Muras
Meister Plugin
-
AAA
Filters Plugin
-
EML Tutorial
HERE
-
Video
HERE
-
PSP Effects

Script
Click on the butterfly to follow the tutorial

Enjoy
Stay at Home !!!
Let's start!!!
-
1.-Open a transparency 900 x
600 px
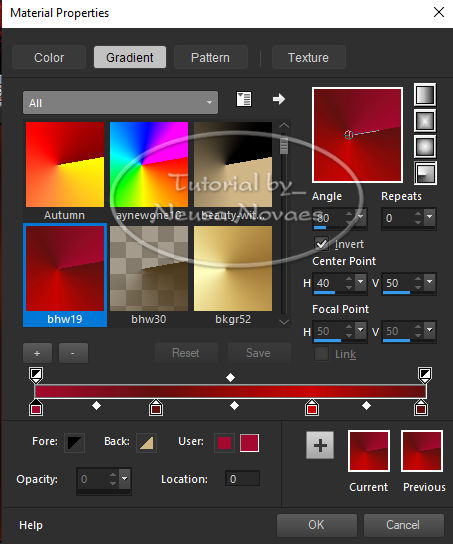
2- Open seu gradient bhw19
annex according to printe-
3- Presents your
transparency
4.- Adjust> Blur> Gaussian
Blur = 20
7. Adjust> Add Remove Noise>
Add Noise = Uniform clicked
and Noise = 30
8.- Duplicate
9.-Layers> New Raster Layer
10.- Preencha com a cor
preta
11.- Plugin Edges Squares>
Square Edges 01
12.- Merge Down
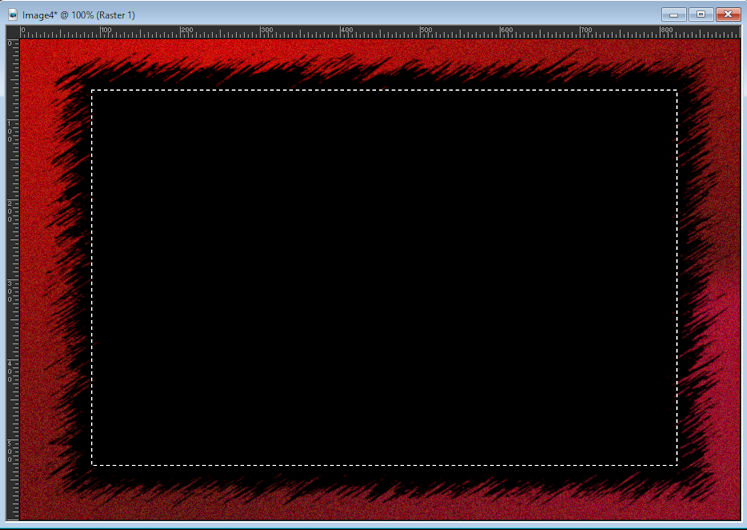
13.- Select according to
printe-
-
14.-Coma DEL delete key and
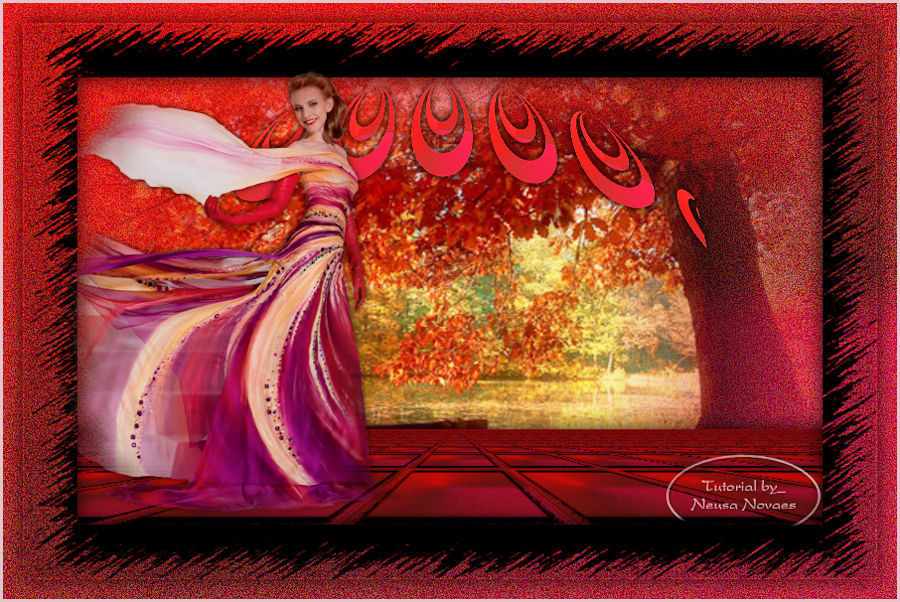
pull to seleçăo
15.- Select all
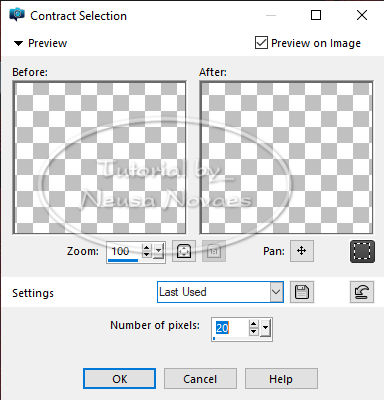
16.-Selectionn> Modify>
Contract according to printe
-
-
-
17.-Invert
18.-Delete with DEL key
19.-Invert again
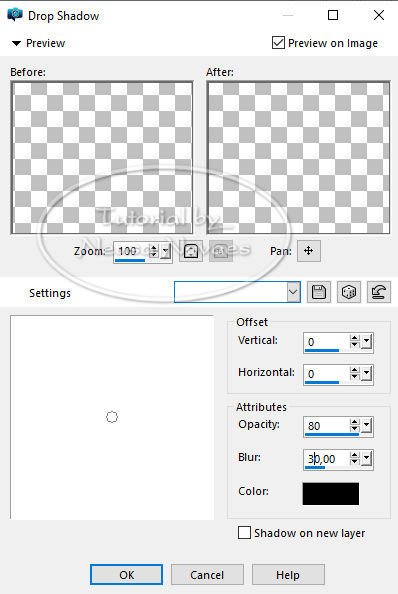
20.-Apply Drop Shadow
according to printe
-
-
21.-Pull to select and pull
to visibility of Raster 1
and Copy
22.- Layers> New Raster
Layer
23.- As a gradient apply as
a present shape to
AltemusBorderFour
24.-Apply Drop Shadow by
changing someone for Blur 10
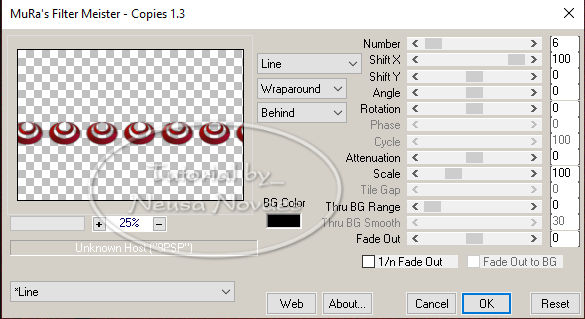
25.-Muras Meister Plugin>
Copy as printe
-
26.-Pull to visibility of
item 25 and return to
visibility of Raster 1 and
Copy
27.-Edit> Copy Special> Copy
Merge
28.-Edit> Paste as New Layer
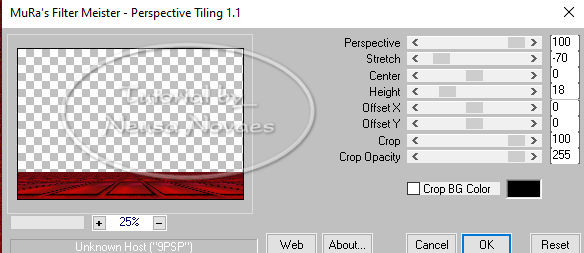
29.-Muras Meister Plugin>
Perspective Tiling according
to printe
-
-
30.-Layers> Arrange> Move
Down 3 times
31.-Hit according to model
(um little for top)
32.-Com a Ferramenta Eraser
clean as laterais and apply
Drop Shadow to taste
33.-Ative a raster 1 e
Layers> New Raster Layer
34.-Select tudo
35.-Open your landscape tube
Edit> Copy
36.-Paste Into Selection
37.-Selection None
38.-Activate Raster 3 and
make visible
39.-Object> Align> Top
40.- Layrs> Arrange> Move
Down 2 times (copy of Raster
1) desça um little according
to model
41.- Apply Adjust> One Stel
Photo Fix nas raster 1 - na
Copy das Raster 1 - na
raster 3
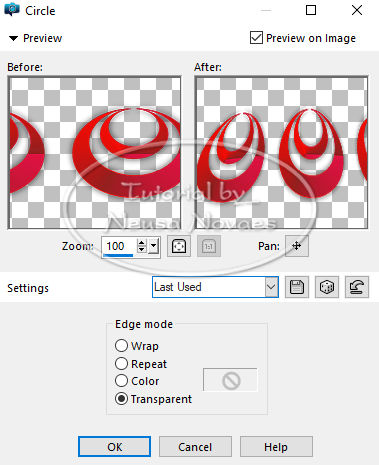
42- Ative a raster 3 (a do
sharpen)
43.- Geometric Effects>
Circle as printe
-
-
44.- Open Copy and cast as nova
layer or tube da mulher
45.-Resize +/- 80%
46.-Apply Drop Shadow and Sharpen More
47.- Apply again or Drop Shadow
48.-Add Borders = 3px cor that matches
49.-Resize = 900 px
50.- AAA Filters plugin> Custom = Sharpen ou
Landscape
51.-Save em JPG
** Tutorial created by Neusa Novaes **
February 16, 2021
Directly reserved authors
Qualquer semelhança is mere coincidence.
Total or partial review, copies, alterations
prohibited
Publication on sites or blogs, with authorization
from the author.
OBSERVAÇĂO: - Năo esqueça to place your credits
directly-
-
-

-
-
 Créditos Créditos
-
-
Tubes Principal: Luz
Cristina
-
-

|